In DriverHub, locations store key information about your company’s sites, terminals, or offices. You can edit existing locations or add new ones to keep your records current. This ensures that jobs, positions, and compliance records are always associated with the correct location.
Video Walkthrough:
Step-by-Step Instructions:
Edit an Existing Location
-
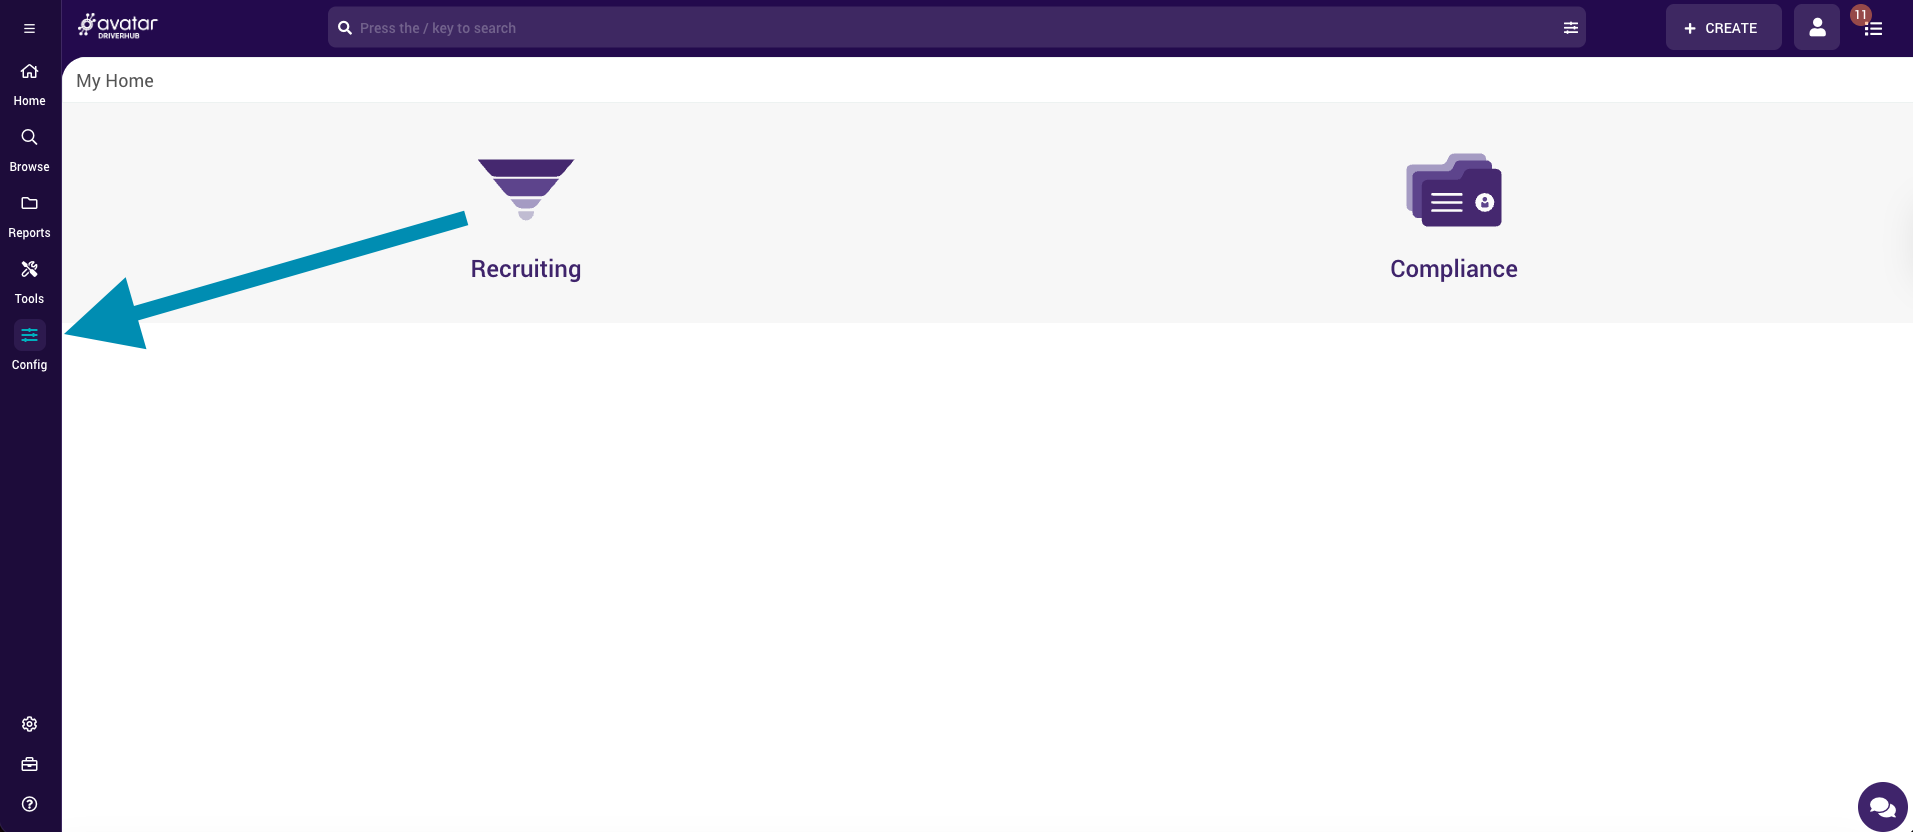
Open the Config Menu
-
From your DriverHub dashboard, click Config in the left-hand navigation menu.
-
-
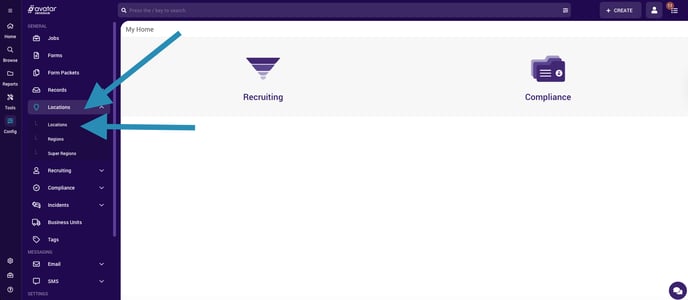
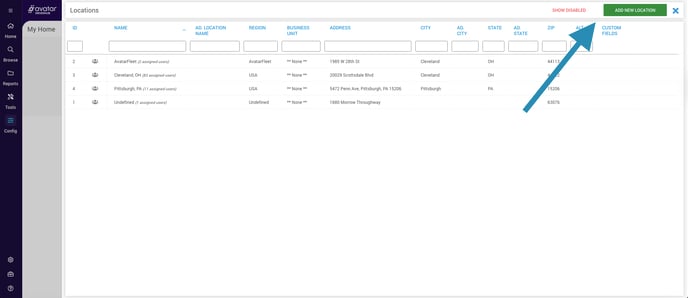
Access Locations
-
Under the Locations section, select Locations again from the submenu.
-
-
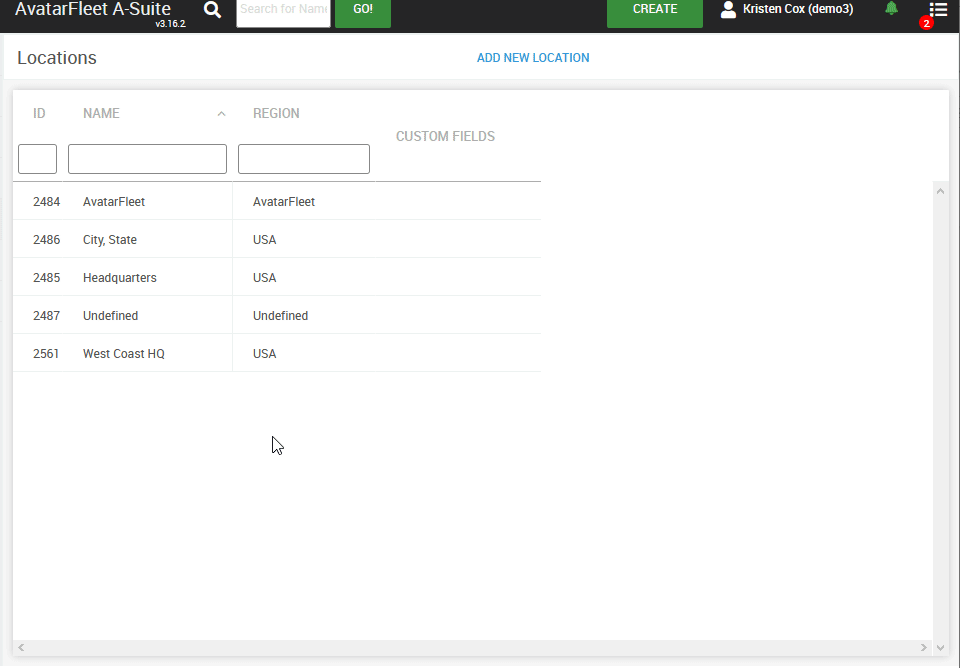
Choose the Location to Edit
-
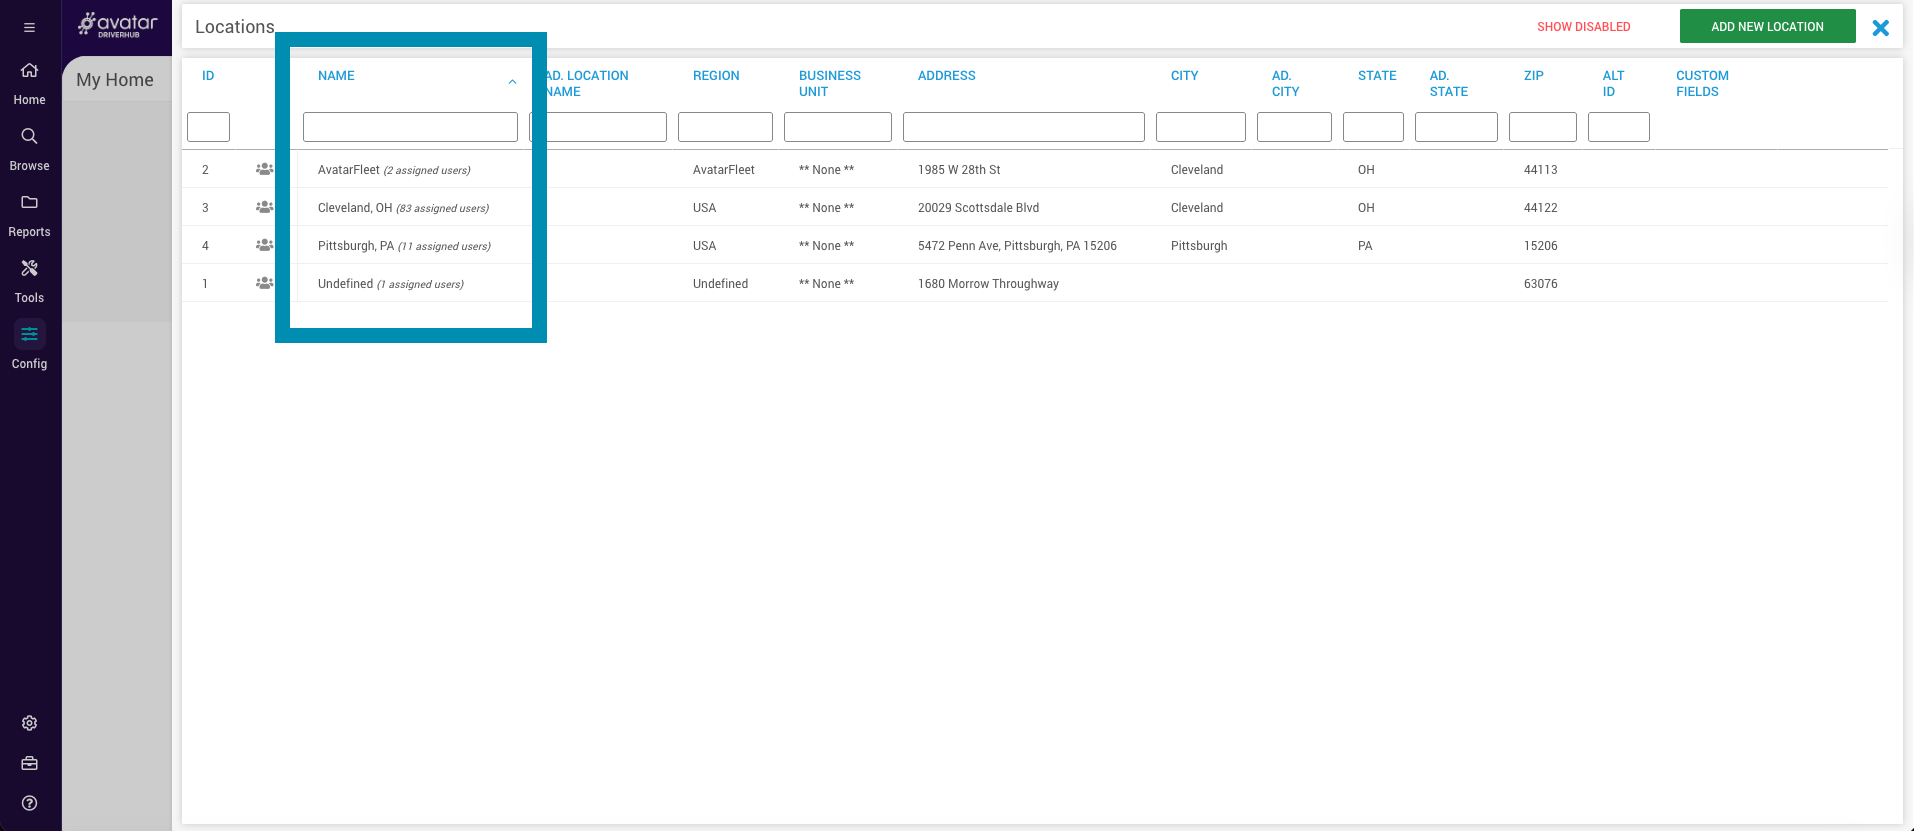
A list of existing locations will appear.
-
Click on the location you want to edit.
-
-
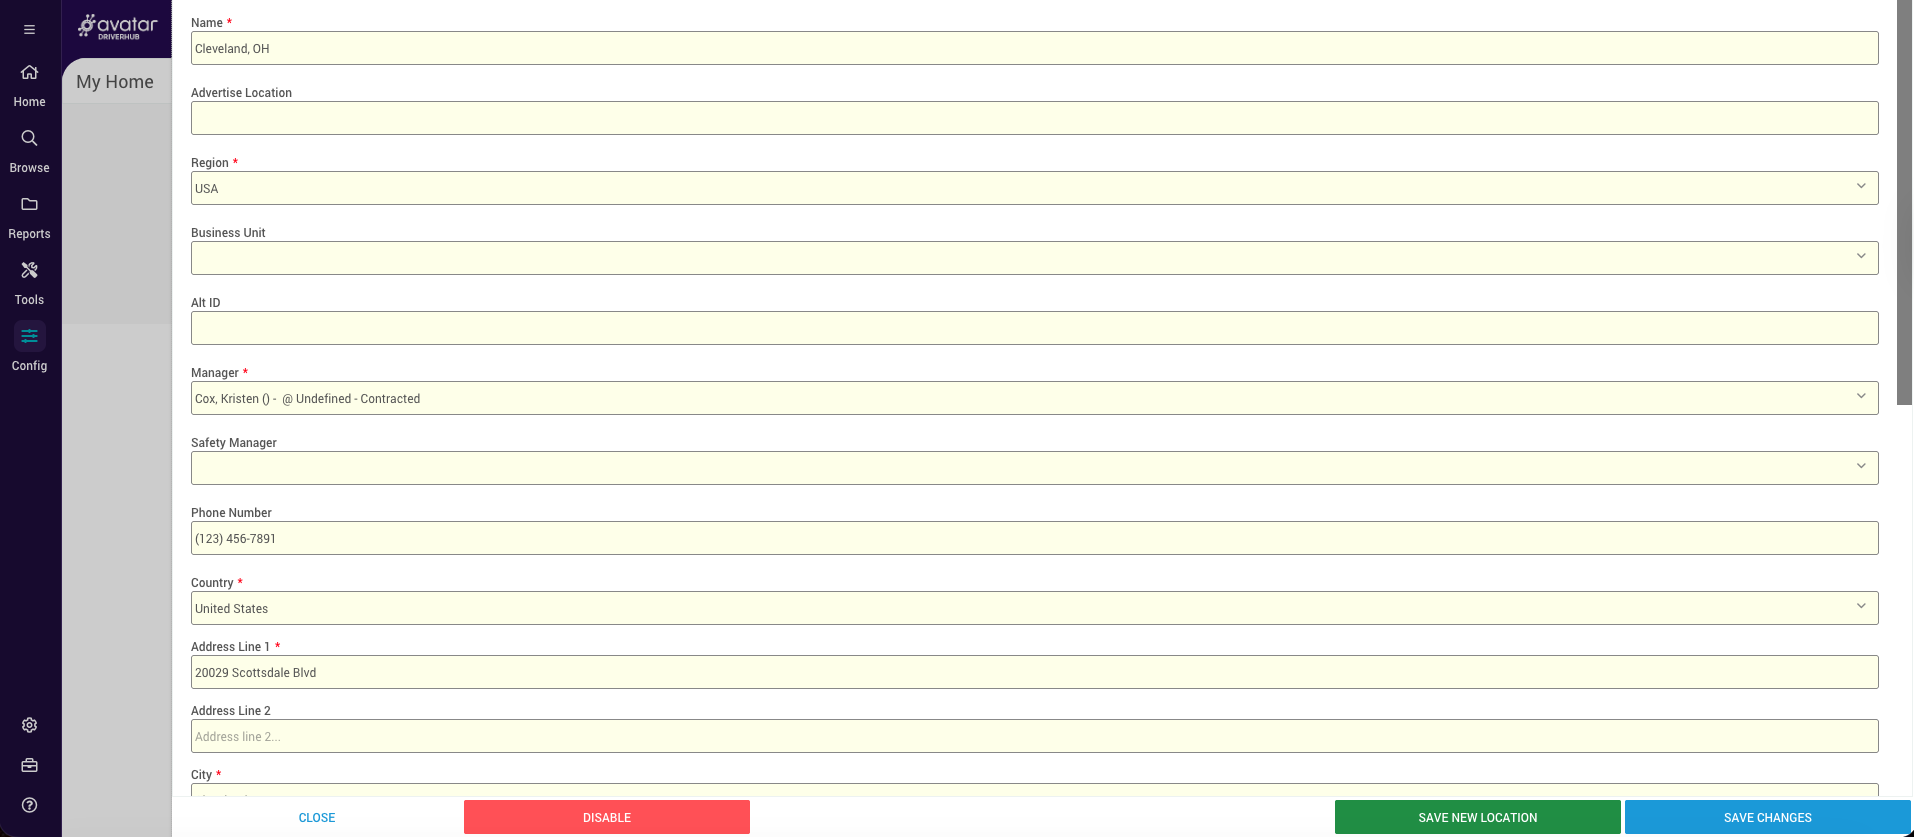
Edit the Fields
-
Update any of the fields as needed. Required fields are marked with a red asterisk (*).
-
-
Save Changes
-
Once you’ve finished editing, click Save Changes to update the location details.

-
Add a New Location
-
Access the Locations Page
-
From the Config menu, go to Locations, then select Locations again.


-
-
Click Add New Location
-
In the upper-right corner, click the Add New Location button.
-
-
Fill Out the Required Fields
-
Complete all fields marked with a red asterisk (*).
-
Required fields include:
-
Name
-
Region
-
Manager
- Country
-
Address Line 1
-
City
-
State
-
ZIP Code
-
-
-
Enter Optional Fields (if applicable)
-
You can also fill out additional fields such as:
-
Advertise Location
-
Business Unit
-
Alt ID
-
Safety Manager
-
Phone Number
-
Country
-
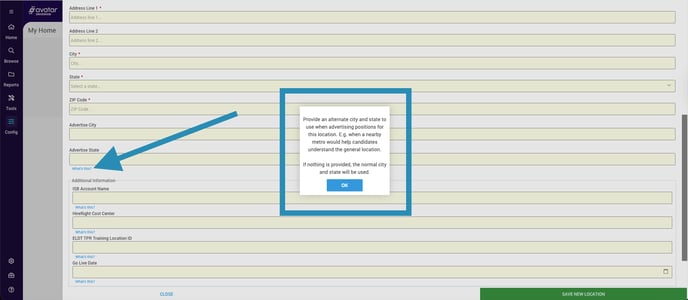
Advertise City and Advertise State
-
ISB Account Name
-
HireRight Cost Center
-
ELDT TPR Training Location ID
-
Go Live Date
-
-
-
Use “What’s This?” Links for Field Details
-
For certain fields, you’ll see a What’s this? link.
-
Click it to learn more about what the field is used for before filling it out.
-
-
Add Custom Fields (Optional)
-
At the bottom of the page, you can configure and add custom fields to capture extra location-specific data.

-
-
Save the New Location
-
When all required and desired information is entered, click Save New Location.
-
Your new location will now appear in the list.
-

As of December 5, 2020, all new Locations will require an address, city, state, and ZIP code. Your previously created Locations will not be affected unless you edit them.
Edit a Location