Locating Candidates Assigned to You
View and filter candidates assigned to you in the Candidates Browser in DriverHub
DriverHub makes it easy to locate candidates assigned to you using the Candidates Browser. By default, the browser filters candidates to show only those that belong to you. You can also manually add this filter if it’s not already applied.
Video Walkthrough
Step-by-Step Instructions
Accessing the Candidates Browser
-
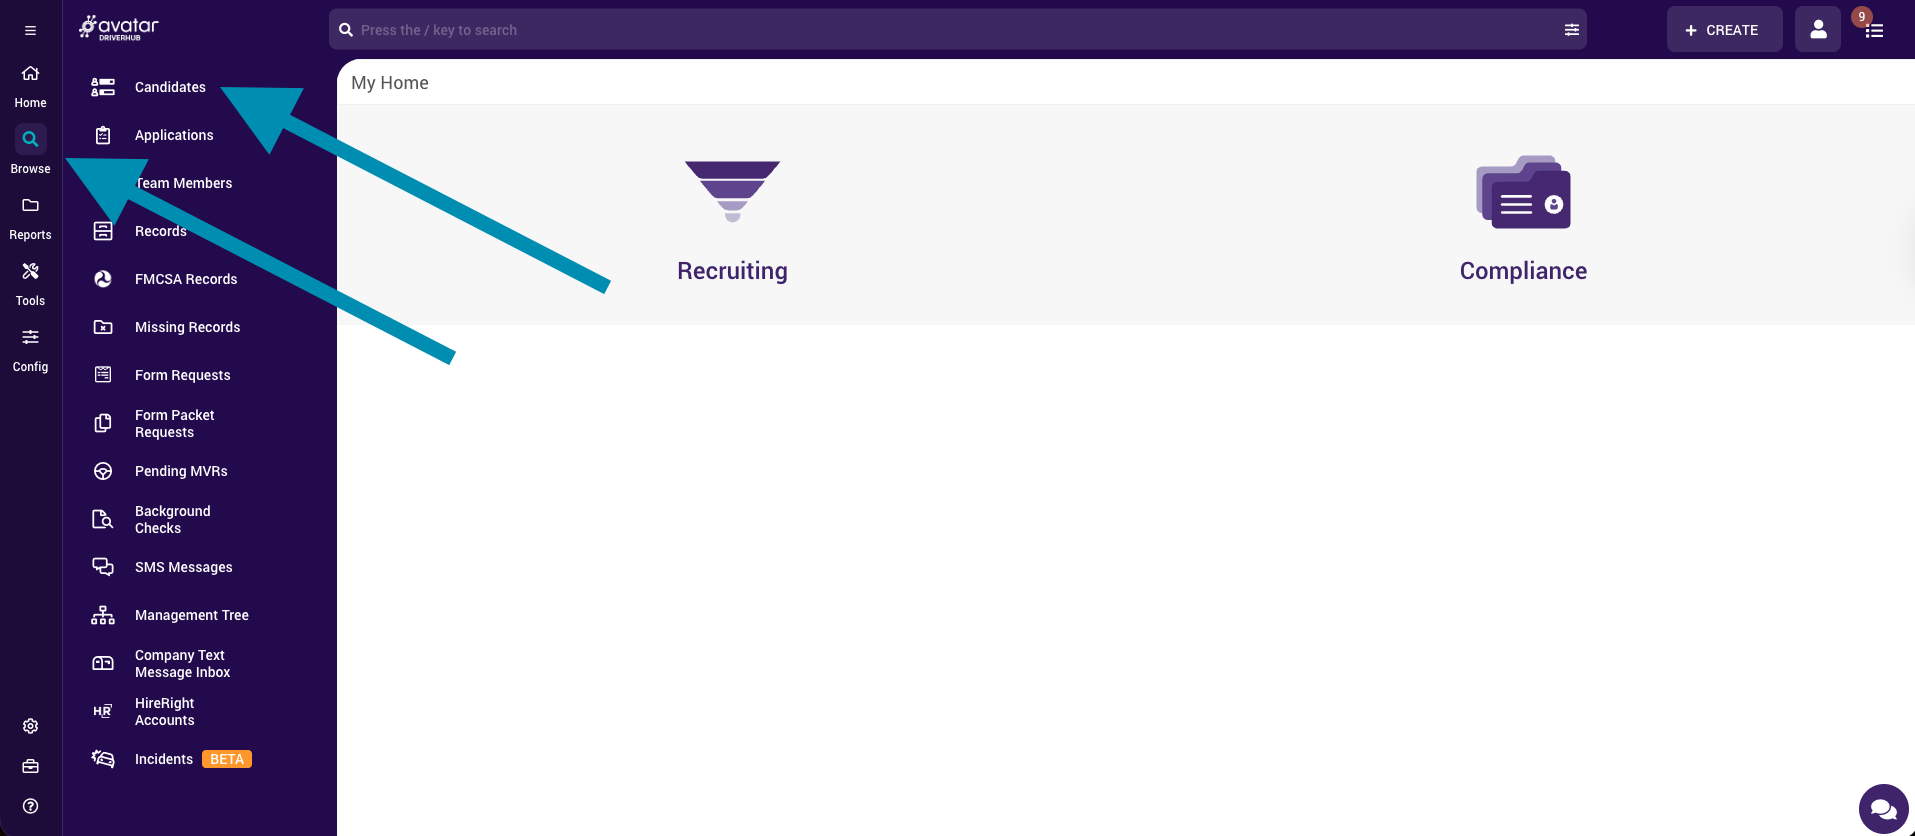
From your DriverHub dashboard, click Browse in the left-hand navigation menu.
-
Select Candidates from the menu.

Viewing Candidates Assigned to You
-
By default, the Candidates Browser will display a filter called Mine?.
-
This filter shows all candidates currently assigned to you.

Adding the “Is Mine?” Filter (if not visible)
-
If you do not see the Mine? filter in the browser:
-
Click the Filters button located next to the Refresh button.

-
In the pop-up window, click Add Additional Filter.

-
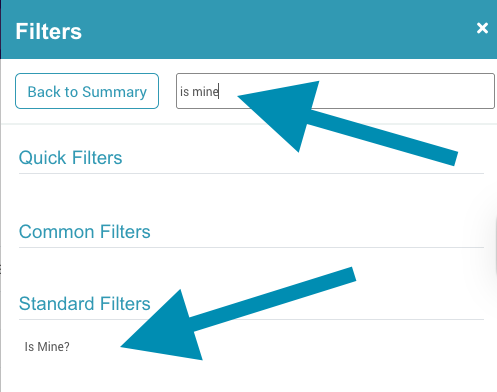
Search for Is Mine? in the list of available filters. Click Is Mine? under Standard Filters.

-
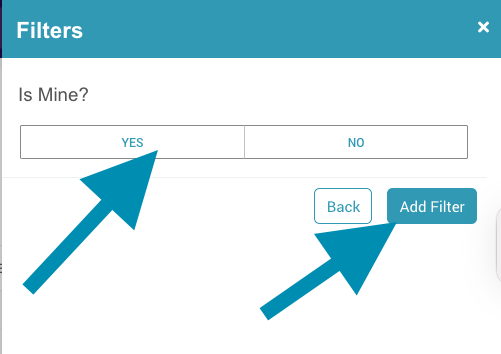
Select Yes, then click Add Filter.

-
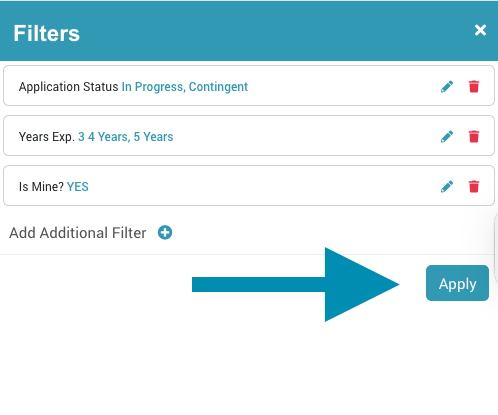
Click Apply to activate the filter.

-
-
The browser will now display only candidates assigned to you.