When you are setting up DriverHub, an important step in managing your team members' usage is the creation of groups and assigning rights to those groups.
Table of Contents
What is a User Group?
The Groups Management Page
Creating a User Group
Ways to Add Members To Groups
Configuring Rights For A Group
Add Custom Fields To A group
What is a User Group?
User Groups serve three main purposes in DriverHub, but they can be created for any purpose:
-
Assigning rights to users.
-
Creating recruiting groups for round-robin application assignment.
- General team member organization.
The Groups Management Page
-
Navigate to the Config > Permissions > Groups.

-
You will see a list of all existing groups, their descriptions, group types, and any custom fields added to the group.

Types
There are five types of user groups, four of which can be chosen in the Create/Edit Group dialog box.
- System: Denotes default groups that are built in to the software, e.g. "Everyone", "Recruiters" and "Candidates". This type of user group cannot be created.
- Rights: A classification used when the group's purpose is to set rights for certain users.
- Recruiting Group: This type lets you connect recruiters within a small team, and then assign applications to that team. Each time an application comes in, it is assigned to the next person in the list, round-robin style.
- Organization: Similar to the Rights type, the Organization type can be used to separate users based on your company's structure or classifications.
- Other: A classification for any other type of group you may like to create.
Creating A User Group
-
Click Add New Group.

-
Enter a group name and description.
-
Select the group type.
-
Select the Visible Record Types that members of the group should be able to open.
-
Add group members by typing their names into the Members field.
-
Click Save.

Ways to Add Members To Groups
There are other ways to add members to groups in addition to within the Create/Edit Group dialog box.
From The User Profile
-
Click the pencil icon to edit the user's profile information.
-
Scroll to the Groups field.
-
Select the groups you want to assign.
-
Click Save.

Team Members Browser Mass Action
-
In the Team Members browser, Create a Task List by using the checkboxes to select the users you want to add to a group.
-
Click the Add or Remove Groups option in the More menu.

-
Choose the group.

-
Click Add Groups to complete the mass action.
Configuring Rights for a Group
-
Open the group and click Configure Rights For This Group.

-
The dialog shows two columns: Available Rights and Configured Rights.
-
Select rights in Available Rights and move them to Configured Rights using the arrow button.
-
To remove rights, move them in the opposite direction.
-
You can move all rights at once using the double arrows.
-
Click Save.
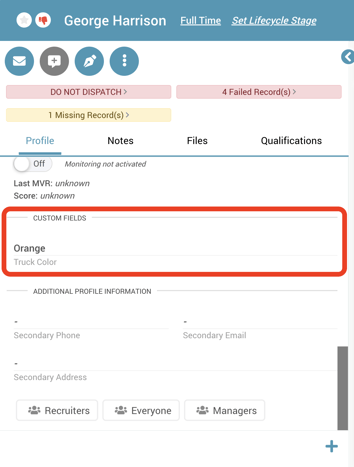
Add Custom Fields to a Group
Custom Fields let you collect additional data about group members.
-
Open the group.
-
Click in the Custom Fields input box.

-
Select an existing field or click Create New to build one.
-
Save the group.
Custom Fields appear in group members’ profiles and can be edited through the same profile edit screen.